This page is part of archived documentation for openHAB 2.5. Go to the current stable version
# Souliss Binding v1
Souliss (opens new window) is a networking framework for Arduino and compatibles boards, and is designed to let you easily build a smart home that is distributed over multiple boards via Ethernet, wireless point-to-point and RS485 bus.
Souliss is an open-source and community driven project, you can use the wiki (opens new window) and Community (opens new window) to get help and share you results. Additional details and examples are available on the openHAB example wiki page (opens new window).
# Table of Contents
# Prerequisites
The binding requires a deployed network. As a minimum, you need one Souliss node with Ethernet access configured as a Gateway (opens new window). A Gateway is a special node that is able to communicate with the user interfaces. The binding interacts as a user interface for Souliss.
A starting point is the Souliss wiki (opens new window). The best is to start with a single node and connect with SoulissApp. The code for networking activities of this binding is based on SoulissApp (opens new window) code, so once connected with SoulissApp, you can move to openHAB directly.
You can use SoulissApp and the Souliss binding at the same time, and generally up to five (by default, but can be increased) user interfaces simultaneously.
# Sketches
The easiest way is start with a simple example to control an ON/OFF light (though a relay). In this section, we show you the code to upload on your Arduino with Ethernet shield (based on W5100 / W5200) or an ESP8266 as SoC and the configuration of your openHAB. The next section will explain the details.
# Arduino with Ethernet Shield
Use the following sketch on your Arduino, before compile ensure that you have installed the Souliss framework from the [[Library Manager | http://www.arduino.cc/en/guide/libraries (opens new window)]], just search for souliss inside the Library Manager and select Install.
You need to change the IP address inside the sketch according to one free IP address in your network.
/**************************************************************************
    Souliss - Hello World

    This is the basic example, control one LED via a push-button or Android
    using SoulissApp (get it from Play Store).

    Run this code on one of the following boards:
      - Arduino with W5100 Ethernet Shield

***************************************************************************/

// Configure the framework
#include "bconf/StandardArduino.h"
#include "conf/ethW5100.h"
#include "conf/Gateway.h"

/*
  If you are using W5200 or ENC28J60, you just need to  change
  the #include "conf/ethW5100.h" with   #include "conf/ethW5200.h"
  or #include "conf/ethENC28J60.h"

  This assume that your SPI Chip Select (CS) is on pin 10 as in
  most of the Ethernet shield.
*/

// Include framework code and libraries
#include <SPI.h>
#include "Souliss.h"

// This identify the number of the LED logic
#define MYLEDLOGIC          0

// Define the network configuration according
// to your router settings
uint8_t ip_address[4]  = {192, 168, 1, 77};
uint8_t subnet_mask[4] = {255, 255, 255, 0};
uint8_t ip_gateway[4]  = {192, 168, 1, 1};
#define Gateway_address 77
#define myvNet_address  ip_address[3]
#define myvNet_subnet   0xFF00
#define myvNet_supern   Gateway_address

void setup()
{
    Initialize();

     // Set network parameters
    Souliss_SetIPAddress(ip_address, subnet_mask, ip_gateway);
    SetAsGateway(myvNet_address);

    // Define a simple LED light logic
    Set_SimpleLight(MYLEDLOGIC);

    // We connect a pushbutton between 5V and pin2 with a
    // pulldown resistor between pin2 and GND, the LED is
    // connected to pin9 with a resistor to limit the
    // current amount
    pinMode(2, INPUT);   // Hardware pulldown required
    pinMode(9, OUTPUT);  // Power the LED
}

void loop()
{
    // Here we start to play
    EXECUTEFAST() {
        UPDATEFAST();

        // We process the logic and relevant input
        // and output every 50 milliseconds
        FAST_50ms() {
            // Use the pin2 as ON/OFF toggle command
            DigIn(2, Souliss_T1n_ToggleCmd, MYLEDLOGIC);

            // Drive the LED as per command
            Logic_SimpleLight(MYLEDLOGIC);

            // Use the pin9 to give power to the LED according to the logic
            DigOut(9, Souliss_T1n_Coil, MYLEDLOGIC);
        }

        // Here we handle here the communication
        FAST_GatewayComms();

    }
}
# ESP8266 WiFi SoC
In this case we use the ESP8266 as a SoC and not simply as a transceiver, so Souliss is loaded directly on the module and doesn't require any other microcontroller. You need to install the ESP8266 cores (opens new window) in your Arduino IDE.
Compared to the previous example, you only need to change the configuration files to specify that you are now using an ESP8266 and the relevant WiFi library.
/**************************************************************************
    Souliss - Hello World

    This is the basic example, control one LED via a push-button or Android
    using SoulissApp (get it from Play Store).

    Run this code on ESP8266 as WiFi SoC.

***************************************************************************/

// Configure the framework
#include "bconf/MCU_ESP8266.h"
#include "conf/Gateway.h"
#include "conf/IPBroadcast.h"

// **** Define the WiFi name and password ****
#define WIFICONF_INSKETCH
#define WiFi_SSID               "mywifi"
#define WiFi_Password           "mypassword"

// Include framework code and libraries
#include <ESP8266WiFi.h>
#include "Souliss.h"

// This identify the number of the LED logic
#define MYLEDLOGIC          0

// Define the network configuration according
// to your router settings
uint8_t ip_address[4]  = {192, 168, 1, 77};
uint8_t subnet_mask[4] = {255, 255, 255, 0};
uint8_t ip_gateway[4]  = {192, 168, 1, 1};
#define Gateway_address 77
#define myvNet_address  ip_address[3]
#define myvNet_subnet   0xFF00
#define myvNet_supern   Gateway_address

// **** Define here the right pin for your ESP module ****
#define	OUTPUTPIN			5

void setup()
{
    Initialize();

     // Set network parameters
    Souliss_SetIPAddress(ip_address, subnet_mask, ip_gateway);
    SetAsGateway(myvNet_address);

    // Define a simple LED light logic
    Set_SimpleLight(MYLEDLOGIC);

    pinMode(OUTPUTPIN, OUTPUT);  // Power the LED
}

void loop()
{
    // Here we start to play
    EXECUTEFAST() {
        UPDATEFAST();

        // We process the logic and relevant input
        // and output every 50 milliseconds
        FAST_50ms() {
            // Drive the LED as per command
            Logic_SimpleLight(MYLEDLOGIC);
            DigOut(OUTPUTPIN, Souliss_T1n_Coil, MYLEDLOGIC);
        }

        // Here we handle here the communication
        FAST_GatewayComms();

    }
}
Of course you have to care about the PIN addressing that is different on ESP8266 compared to an Arduino board.
# Binding Configuration
This binding can be configured in the file services/souliss.cfg.
The binding isn't able to locate your Souliss gateway as the SoulissApp (opens new window) does, so you should specify the networking information in configuration as follows.
| Property | Default | Required | Description |
|---|---|---|---|
| IP_LAN | Yes | IP address of Souliss Gateway node. Use the IP address loaded in your Arduino sketch. Example: 192.168.1.77 | |
| USER_INDEX | Yes | index of the binding between 1 - 100. Please ensure that each user interface (SoulissApp, openHAB, ...) has a different USER_INDEX and NODE_NUMBER. Those values are used to identify the interface. You can get the values used by SoulissApp from the Networking menu. | |
| NODE_INDEX | Yes | node of the binding between 1 - 254. Please ensure that each user interface (SoulissApp, openHAB, ...) has a different USER_INDEX and NODE_NUMBER. Those values are used to identify the interface. You can get the values used by SoulissApp from the Networking menu. | |
| SERVERPORT | No | leave empty for casual port | |
| REFRESH_DBSTRUCT_TIME | 600000 | No | time in milliseconds |
| REFRESH_SUBSCRIPTION_TIME | 120000 | No | time in milliseconds |
| REFRESH_HEALTY_TIME | 60000 | No | time in milliseconds |
| REFRESH_MONITOR_TIME | 500 | No | time in milliseconds |
| SEND_DELAY | 1500 | No | time in milliseconds |
| SEND_MIN_DELAY | 100 | No | time in milliseconds |
| SECURE_SEND_TIMEOUT_TO_REQUEUE | 5000 | No | time in milliseconds |
| SECURE_SEND_TIMEOUT_TO_REMOVE_PACKET | 30000 | No | time in milliseconds |
# Item Configuration
souliss=<Typical>:<nodeID>:<slot>[:<bit>]
where:
<Typical>is one of predefined logic dedicated to smart home devices like lights, heating or antitheft.<Typical>can be one of T11, T12, T13, T14, T16, T18, T1A, T22, T51, T52, T53, T57.<Typical>s are defined here (opens new window). Typicals match directly with openHAB items. This defines the interaction between the user interface in openHAB (same is for SoulissApp) and the action executed by the node.<nodeID>is the ID of the node. The first node listed in your SoulissApp has<nodeID>1. Increase for your further nodes. Can be in the range 1 - 254.<slot>is the slot where your<Typical>is located. This is defined in the sketch loaded in your node. Can be in the range 1 - 254.- sections in
[square brackets]are optional <bit>is used only for<Typical>s that work bitwise, as T1A. Can be in the range 1 - 8.
# Service Typicals
In order to track the health and timestamps, two service <Typical>s has been introduced: D98 (Health) and D99 (Timestamp). Those are not defined in Souliss sketches and are only available in the binding.
souliss="D98:<nodeNumber>:998"
souliss="D99:<nodeNumber>:999"
Example:
Number HEALTH_Nodo1_GF_Servizio "Health Nodo 1 [%1d]" <keyring> (Diagnostic, TechnicView_Node0) {souliss="D98:0:998"}
String TIMESTAMP_Nodo1_GF_Servizio "Timestamp Nodo 1 [%1$td.%1$tm.%1$tY %1$tk:%1$tM:%1$tS]" <keyring> (Diagnostic, TechnicView_Node0) {souliss="D99:0:999"}
# Examples
# Items
Group All
Group grp1              (All)
Group Diagnostic        (All)
Group TechnicView_Node0 (All)
Group Health            (All)

Switch SimpleLight  "SimpleLight" (grp1, TechnicView_Node0) {souliss="T11:0:0", autoupdate="false"}

Number HEALTHNodo0 "Health Node 0 [%1d]" <keyring> (Diagnostic, TechnicView_Node0, Health) {souliss="D98:0:998"}
String TIMESTAMP_Nodo0 "Update Node 0 [%1$td.%1$tm.%1$tY %1$tk:%1$tM:%1$tS]" <keyring> (Diagnostic, TechnicView_Node0) {souliss="D99:0:999"}
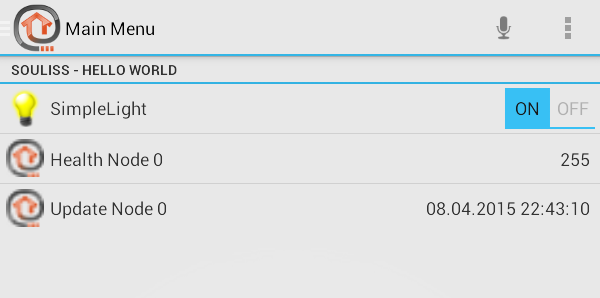
If you have correctly configured Souliss and openHAB, you can see and control the switch from the openHAB interface:
items/soulissdemo.items
Switch LuceSogg "LuceSogg" (GF_Soggiorno, TechnicView_Node0) {souliss="T11:0:6", autoupdate=false}
Number Temperature_GF_Soggiorno "Temperatura Soggiorno [%.1f °C]"   <temperature> (temperature, GF_Temperature, TechnicView_Node0) {souliss="T52:0:0"}
Number Umidita_GF_Soggiorno "Umidità Soggiorno [%.1f %%]"   <temperature> (temperature, GF_Temperature, TechnicView_Node0) {souliss="T53:0:2"}
Number Consumo_GF_Soggiorno "Consumo [%.1f W]" <energy> (GF_Temperature, TechnicView_Node0) {souliss="T57:0:4"}
Rollershutter Shutter1_GF_Soggiorno "Tenda1" (GF_Soggiorno, TechnicView_Node3 {souliss="T22:3:0", autoupdate=false}
Contact ContattoTest "Contatto" (GF_Soggiorno, Lights) {souliss="T13:0:1", autoupdate=true}
Contact C2 "BIT 3" (GF_Soggiorno, TechnicView_Node3) {souliss="T1A:3:5:2"}
Contact C3 "BIT 4" (GF_Soggiorno, TechnicView_Node3) {souliss="T1A:3:5:3"}
Color  RGB_Led_Strip_1 "RGB Led Strip 1" <slider> (GF_Soggiorno)  {souliss="T16:0:2", autoupdate=false}
Switch SwitchAutoMode 	"T12" 		(GF_Soggiorno, TechnicView_Node3) {souliss="T12:3:0:switch", autoupdate="false"}
Switch SwitchAutoMode_setup 	"Auto" 		(GF_Soggiorno, TechnicView_Node3) {souliss="T12:3:0:automode", autoupdate="false"}
Number Temperature_GF_Soggiorno     "Temperature [%.1f °C]"    <temperature> (T31, TechnicView_Node0) {souliss="T31:1:0:measured"}
Number Temperature_2F_Living_SP "Temp Set Point [%.1f °C]"     <temperature> (T31, TechnicView_Node0) {souliss="T31:1:0:setpoint"}
Switch setasmeasured "Set as measured" <temperature> (T31, TechnicView_Node0) {souliss="T31:1:0:setasmeasured", autoupdate="false"}
Switch heating_cooling "Heating Mode" (T31, TechnicView_Node0) {souliss="T31:1:0:heatingcooling", autoupdate="false"}
Switch heating "Heating" <siren>  (T31, TechnicView_Node0) {souliss="T31:1:0:heating"}
Switch cooling "Cooling" <siren> (T31, TechnicView_Node0) {souliss="T31:1:0:cooling"}
Switch fan_off "Fan Off" (T31, TechnicView_Node0) {souliss="T31:1:0:fanoff", autoupdate="false"}
Switch fan_low "Fan Low" (T31, TechnicView_Node0) {souliss="T31:1:0:fanlow", autoupdate="false"}
Switch fan_med "Fan Med" (T31, TechnicView_Node0) {souliss="T31:1:0:fanmed", autoupdate="false"}
Switch fan_high "Fan High" (T31, TechnicView_Node0) {souliss="T31:1:0:fanhigh", autoupdate="false"}
Switch power "Power Off" (T31, TechnicView_Node0) {souliss="T31:1:0:power"}
# Sitemap
This will build a ligh switch and two items with health and last data access.
sitemaps/soulissdemo.sitemap
sitemap soulissdemo label="Main Menu"
{
Frame label="Souliss - Hello World" {
        Switch item=SimpleLight mappings=[ON="ON", OFF="OFF"]
        Text item=HEALTHNodo0 icon="icon16x16"
        Text item=TIMESTAMP_Nodo0 icon="icon16x16"
    }
}
← SonyProjector Spotify →